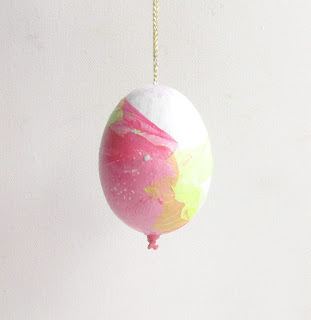
This week, it's an Easter Extravaganza. We have marbled eggs, decorated bunnies, crocheted flowers and a gorgeous take on the traditional Easter Tree. All of these have been made to dress-up a family do we're having, in a little village hall in West Wales. With a few foraged, upcycled and decorated objects, we've got an eggcellent (ahem, sorry, couldn't help it) center piece for our lunch table.
So first up: Prepping stuff for Marbling
I've marbled some eggs and a bunny. To prep your eggs:
Make a small hole in the top and bottom with a sharp pin, and then holding you egg over a bowl, blow as hard as you can through one of the holes. This should force the egg out of the other hole leaving you with an empty shell. Warning: this is hilarious AND difficult.
I then threaded a long yarn needle with some golden thread, and fed it through the egg to make a loop to hang it by. This not only makes it ideal for hanging up, but also makes it much easier to marble.
Paint your egg with white acrylic paint and leave to dry.
The bunny is a ready-made, papier mache chap form HobbyCraft, that I also painted white.
Marbling with Nail Varnish
You will need:
Nail varnish
Shallow dish
Warm water
The trick to this is, just to use a few drops of nail varnish. The varnish sits on the top of the warm water like a sheet of plastic, so don't imagine that you dip something in and it comes out with a pretty inky print - this stuff wants to come out in a whooooole sheet of varnish. The knack is to dip and twist your object, so that the sheet of varnish wraps around it.
If you don't want to ruin your finest china, cut the bottom off an old, plastic milk bottle to use instead.
If you haven't threaded a loop of string through them, having an egg cup or old egg box to rest them in once they're dipped is a good idea.
You can then dip whatever bit of your bunny that you like...
Now for the Easter Tree
You will need:
Twigs
Copper Spray paint
Strings of beads (thrifted pearls and twinkly things are ideal for this)
Marbled Eggs
Pompoms
Flowers
Fairy lights
Vase to stand them in.
You can literally festoon it with whatever you like, for me, more is definitely always more ;)
Make sure your twigs are as dirt free as possible, then lie them down on some newspaper (and preferably outside), spray with the copper spray - lots of short, quick sprays work best. Make sure you cover all of them.
Pop in a vase, twist you little lights around is you have them, and then have the most utterly joyful half an hour, stringing pearls, dangling beads, tying flowers and pompoms and hanging eggs from them.
The little crochet flower pattern will be available soon over at LoveCrochet.com, so keep 'em peeled and have a lovely holiday! xxx


I tried marbling a while back on cut out shapes from old plastic containers, it's such a fun technique- like real magic. I love your Easter take on it . Pinning for next year!
ReplyDeleteHey your blog is very nice, such useful information you are sharing. I really like your blog the information is very accurate and if you want to know more about free ad posting service,www.helpadya.com there is another website with best information.
ReplyDelete