
This is a little lesson to show you how to make a flower, it uses a bit of chain stitch and some nice, long stitches. The flower however, is just a suggestion, do take the time to experiment yourself, once you've got the knack of it you can make almost anything.
You will need:
Colourful thread and a suitabley sharp needle
Small scissors
A gel pen - yep!
Start by sketching your design on your garment. I use gel pens as they'll draw on any colour and come out in the wash.

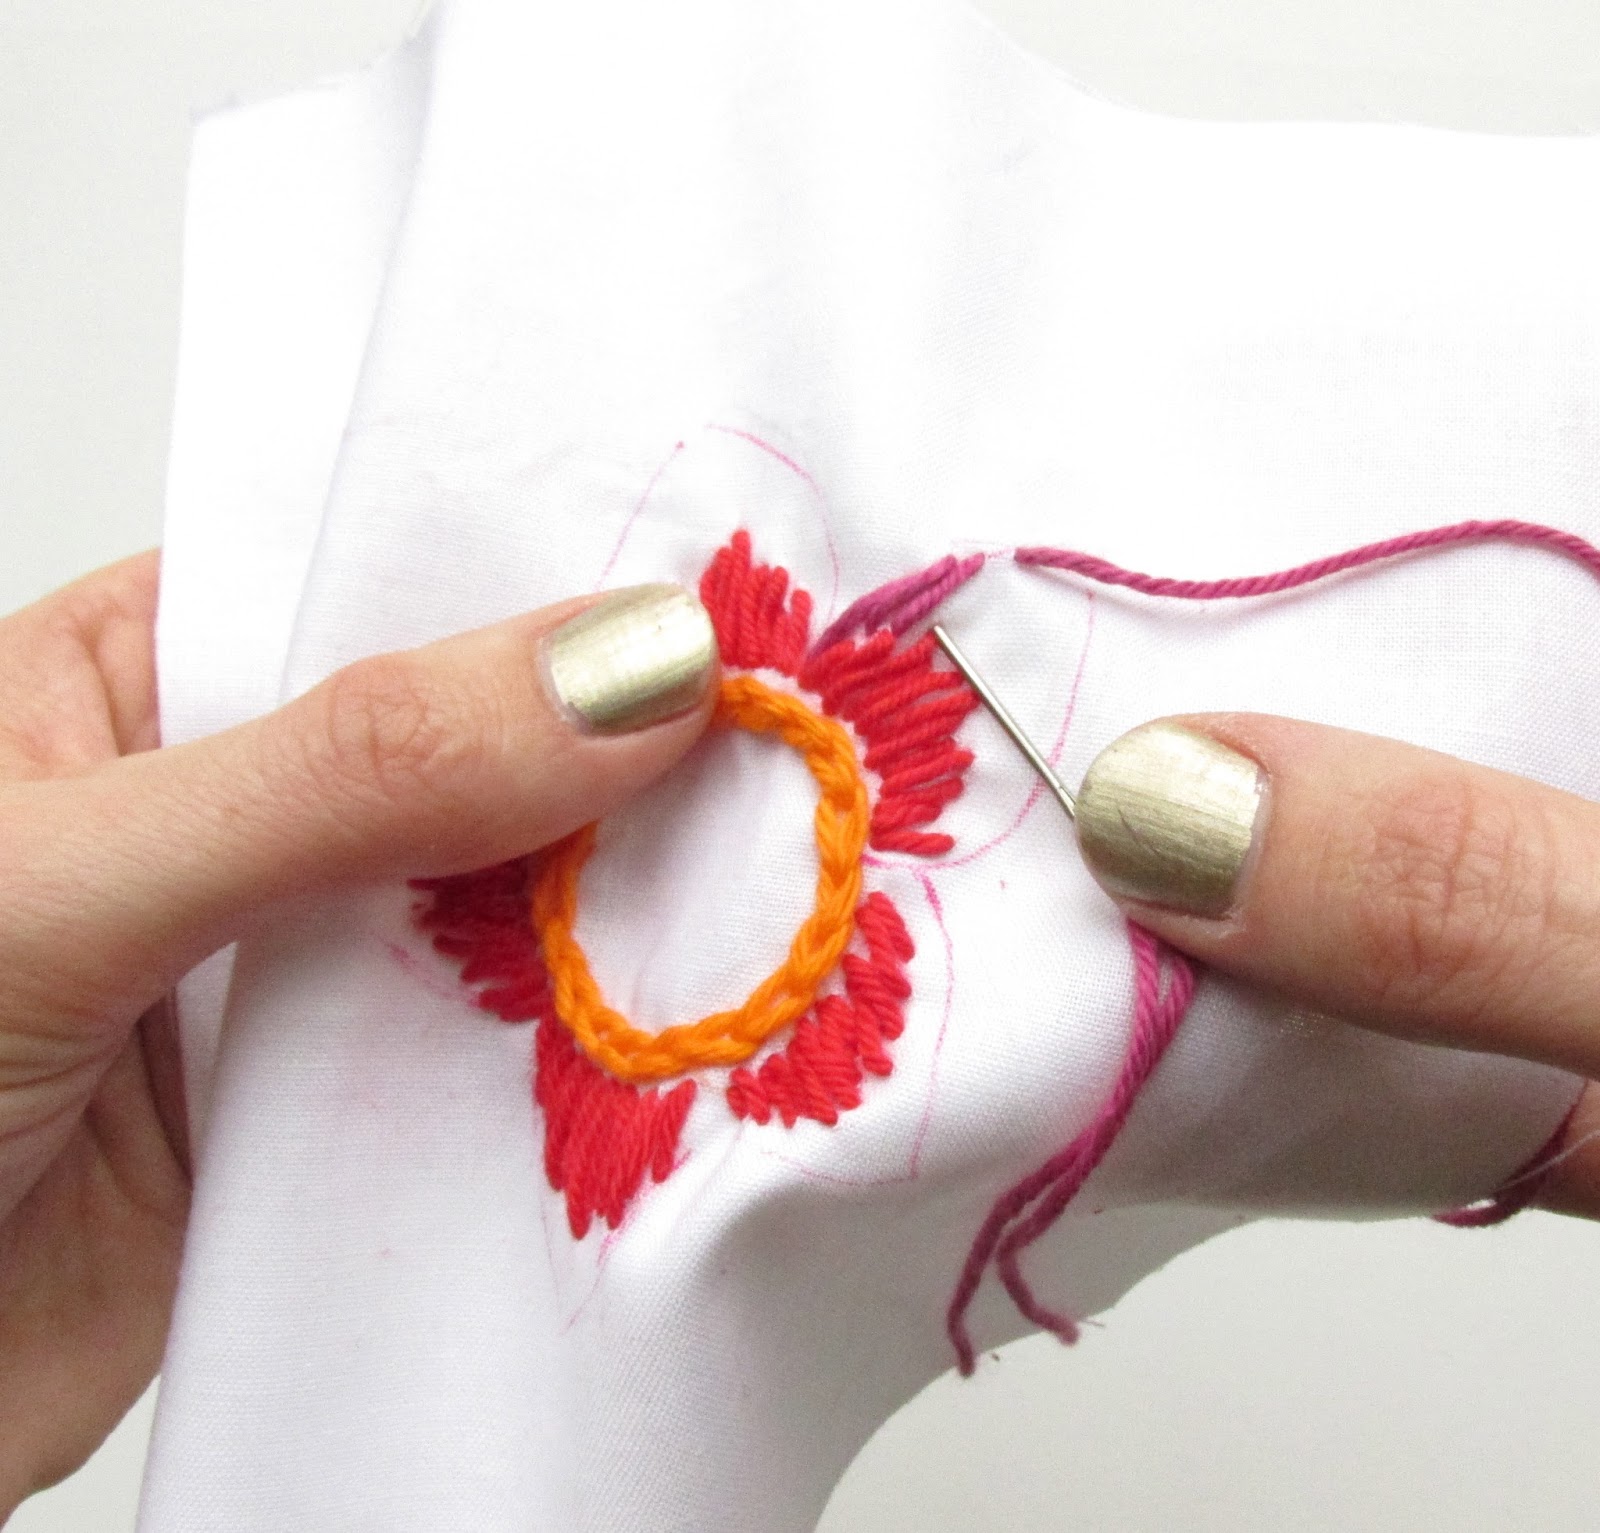
We're going to work the central circle using a chain stitch. So choose your colour, thread up your needle, tie a knot if you like and insert it from the back. Now make a little loop with the thread and hold it in place with your thumb.

Insert the needle into the hole you just came out of - front to back this time.

Pull your needle all the way through and you have made the first chain. Make another loop, and repeat.

Once you've completed the circle, pick a yarn colour for the inner section of the petal. Insert your needle from back to front, using the edge of your circle as a starting point. Insert back in around about 1/4 of the way up your petal.

Now, turn your work over and insert your needle side of where you last went in, like so:

This will stop your work from getting all scrunched up. Keep going, varying the height a of your stitches a little.

The back should look like this:

Once you've completed your inner stitches, pick another colour and repeat this technique to create the outer stitches of the petal.
It should start to build up to look a bit like this:

When you've finished, add a few, little stitches in the middle, and you'll have all the skills to cover your reclaimed top, like this:

And then you can do this!


This is awesome! Thank you for sharing this inspiration and instruction ;-)
ReplyDeleteThank you for joining us! xxx
DeleteThank you for the inspiration and kick-start! I bought a cheap, but very plain, sweatshirt to keep warm on a school residential recently and would love to make it more wearable. The stormtrooper design looks just the ticket, where did you find it?
ReplyDeleteThank you
MT